Welcome to the first entry in our new blog series, Website tips for… – a dive into the nuances and applications of good web design practices for specific types of brands, industries, or niche audiences.
We’re kicking off with expert tips for designing a jewellery website, probably one of the most common types of small business website we’ve built here at Studio Cotton. So without further ado, let’s dive in.
1. You’re in a wildly competitive SEO space, so plan to invest more time writing
Search engine optimisation (SEO) is the practice of optimising your website and marketing activity to rank as highly and as often as possible in Google search results.
One of my go-to SEO sayings is that your SEO only needs to be as good as your competitors’ – unfortunately, jewellery brands have an absolute buttload of competitors.
We’re not even chatting about ‘just’ other jewellers – we’re chatting about every other piece of content about jewellery.
So SEO-wise, you need to fight a crowd of:
- Jewellery brands
- Multi-brand jewellery shops
- Fashion & home shops that sell jewellery
- Articles about jewellery
- Supplies and guides for making jewellery
- And many mooorrreeee
What’s more, jewellery opinions are pretty much totally subjective to the individual customer, and almost entirely based off of pieces’ appearance.
This is a right pain for small business owners, as the most effective tool for impacting our SEO is the written word. So in theory, you could write the absolute perfect website content for jewellery, and still lose out if it’s mainly reaching an audience whose tastes aren’t aligned with your jewellery design aesthetic.
So, you should sack SEO off, right? After all, you don’t stand a chance.
No, because you do stand some solid chances – specifically for your individual product pages.
It’s certainly more difficult to rank more highly and more often – but it’s far from impossible. Just be prepared to work harder for it, and (I’m sorry) for it to take a little longer.
I would start by taking some real time and effort (or outsourcing) to craft some exceptional product descriptions – we’ve even got a guide that will help you to get started.
2. List gold and silver variants as individual products
I have a feeling that this point might be controversial in the world of SEO, but it just makes oh-so-much sense for jewellery brands.
Most ecommerce websites use two types of products:
- Simple, where there is only one version of a product, e.g. a classy ceramic travel mug
- Variable, where multiple versions of the same item exist, e.g. a classy ceramic travel mug available in 6oz and 10oz sizes
Usually, when you have the exact same product with a single changing characteristic, a variable product is always the way to go. It keeps the different options in one place, helping customers jump between colours, sizes, patterns, or fragrance. It can also drastically cut down on the brand’s website management time since there’s only one product page to maintain.
But that also means there’s only one page for Google to index, and only one opportunity to match your customer’s search phrase.
Let’s say that you sell a bracelet with different beach-themed charms, which comes in gold and silver. You have published a variable product on your jewellery website with the title ‘Seaside charm bracelet’. Solid choice.
Now, let’s say your top competitor, Ginny’s Gemtopia, has a similar bracelet (not as cute as yours though) and has published two separate simple products, ‘Gold seaside charm bracelet’ and ‘Silver seaside charm bracelet’.
A potential customer then Googles ‘Gold seaside bracelet’. Metal colour is a dealbreaker or dealmaker for many jewellery purchasers – so it’s incredibly likely to be included in the phrase your customer is typing into Google.
As far as Google is concerned, Ginny’s ‘Gold seaside charm bracelet’ is closer to ‘Gold seaside bracelet’ than your ‘Seaside charm bracelet’ – so Ginny is way more likely to rank higher.

3. Base your website filters on metal colour and gemstone colour
Product filters allow customers to narrow down a shopping shortlist, removing the options that don’t hit scratch their itch. From a technical perspective, product filters are typically based off product attributes (qualities they have).
Unfortunately, this method of setting up product filters can leave your customers’ shortlists a little too short.
Let’s say you sell jewellery made from 9ct gold, 18ct gold vermeil, 18ct gold plate, and sterling silver. Your customer is a gold jewellery person, but they’re not really fussy when it comes to how much gold is in that gold.
If you use the product attribute of metal for your filters, that would force your golden customer to have to look at 3 lists, or tick all three boxes. It would also require them to know what gold vermeil is – which even I had to Google, even though it’s been explained to me many times.
The same goes for gemstones. A customer might fancy a green gemstone ring but isn’t fussed if that’s a sapphire, emerald, garnet, tourmaline or even a very fancy green diamond.
What’s more, if you use a filter based on the gemstone (and not the gemstone colour), a blue-loving customer might select ‘sapphire’ as that’s the gemstone that their memory has told them is blue.
But alas, you only have pink, yellow and green sapphires, leaving the customer to believe you do not sell any blue-gemmed jewellery. They will never know that you actually have a significant collection of topaz, aquamarine, and tanzanite beauties.
To solve this issue, you might have to use product taxonomies – like categories, collections, and tags – to allow your customers to filter your jewellery based on jewellery colours.
4. But still emphasise the metal/material composition on your product pages
I’m starting this entry with a quick tangent – I love getting my friends, colleagues, and collaborators to contribute to my blog articles. Getting their expertise and experience always adds value, and gives me more ideas for jamming in even more helpful advice.
So when I was planning this article on designing a jewellery website, how could I not get in touch with Hannah – the founder and designer behind SLAB Jewellery and our go-to web design freelancer.
Here’s what Hannah has to say about metal composition;
I think it’s also important to clearly show the difference between ‘Gold Plated’ or ‘SOLID GOLD’ pieces.
It can be hard to tell just by looking at a picture, so make it super clear in either the description or by using a flag/badge to highlight what’s what.
As a jeweller, you often think that it’s obvious from the price which is solid and which is plated, but if you’re new to buying handmade jewellery it’s easy to get confused.
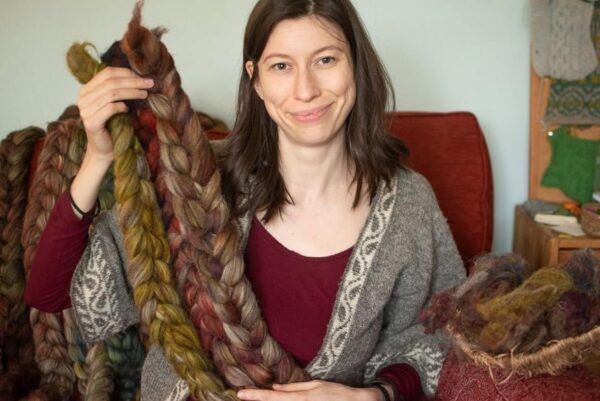
5. Focus your product photography on consistency, not model use
Model photography is more expensive than other types of product shoots. I mean, you have to pay for a model for one, and then there’s hair, makeup, retouching, venues and more.
Often jewellers will make the decision to dedicate more of their budget towards a model shoot once or twice a year, but it can mean that jewellery pieces released away from shoot season have to make do with a more DIY approach to product pics.
In this situation, I would prioritise a higher frequency of product lifestyle shoots. These are product shots that use styled compositions, rather than models, to sell the brand lifestyle and aesthetic. It’ll increase consistency, and help you avoid that hodge-podge, jumble sale appearance that too many disparate shots can create.
I asked another good friend and long-time collaborator, Georgia de Lotz, to help me out with this article. As an interiors and lifestyle product photographer, Georgia has photographed more pieces of jewellery than she could possibly count.
Using models to capture jewellery being worn is a great way of showing scale and fit, but this only works in conjunction with high quality product photography which is extremely, if not more, important.
Potential customers have to see a clear, close-up image to see the detail and finish of your item.
All too often I see jewellery modelled beautifully, but your eye is incredibly distracted by the model itself; fancy nails, other pieces of jewellery, hair, make-up, clothing, etc. It almost becomes a fashion shoot, and whilst it’s beautiful imagery, it can only be effective in sales if you complement these images with high quality, simply styled imagery.
So basically, you’re going to need styled product shots whether you have model pics or not – so make sure this box is checked first.
6. Sell your bespoke jewellery design service
Heaps of jewellers offer bespoke jewellery design – but not many actually sell the service.
When reviewing jewellery websites, I’ll often find a semi-neglected, un-styled web page which has a paragraph of text letting the reader know that they can get in touch about bespoke jewellery. If we’re lucky, we’ll also get a contextless gallery of jewellery pics too.
Oh my golly gosh, is this a massive missed opportunity. These minimal pages provide so little content that it’s nigh-on impossible for them to rank well, but they also fail to actually convince the reader why they would want to work with you, and buy your bespoke jewellery.
Instead, it’s best to approach bespoke jewellery design website pages the same way any other service business does, which means covering:
- A quick marketing pitch
- Why someone would want bespoke jewellery
- Types of jewellery you sell – engagement rings, wedding sets, remodelling
- Your design approach and jewellery style
- Your bespoke design process
- Customer testimonials
- Case studies/gallery
- Timings and availability
- A big-ass call to action
If you would like an example of a bespoke jewellery design page we’ve created, check out our wonderful client, Bristol fine jeweller Jacks Turner.
I also spoke to jeweller Militza Ortiz, a member of the Studio Cotton Clubhouse to ask is she had seen an increase in traffic or bookings since the bespoke service page on her website…
Absolutely! Particularly as I set up a separate page for “jewellery remodelling & redesign”. The trend for upcycling your old jewellery is huge. The reality is that for most jewellers bespoke is what is the most financially sound part of business.
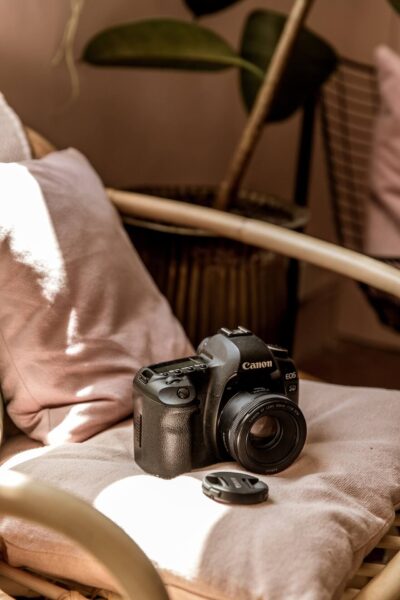
7. Create an at-home photoshoot set-up for one-of-a-kind jewellery
I’ve already emphasised how important consistent, quality photography is for a jewellery website, but I also totally understand that it can be impractical to shoot every product, especially those that are one-of-a-kind or bespoke.
That’s where a simple, in-house photography set-up can make all the difference. I’ll hand back over to Georgia with tips on how to create a bangin’ DIY photo set-up.
There is one thing that you MUST have if you’re taking your own photography: white foam board (A1 is £4.30 in Hobbycraft). It bounces natural light onto your jewellery, making it beautifully lit!
For flatlays, cut foamboard into three pieces to create a U shape and place next to a window, shoot with the natural light coming in from the side, and the white board will bounce light into your flatlay set-up.
For table set-ups, cut foamboard into two pieces to create a 90 degree angle, keep the natural light to the right of you and one piece of foamboard at the back and other opposite the window.
Shoot on bright cloudy days, and avoid direct sunlight by using white tissue paper to diffuse and soften the light. Use an additional bit of foam board to bounce light off your jewellery and make it sparkle.
8. Nail depth of field for fiddly product shots
One last photography tip – this one is for DIYers, and it’s all about depth of field. When it comes to product people sell, jewellery is amongst the teeniest.
When stud earrings are as small as a handful of millimetres, we need to take a little extra care when it comes to capturing the details of jewellery.
A common sticking point for DIY photographers is keeping the entire product in focus. When you’re dealing with miniatures, often a camera will only focus on one ‘spot’, which means details like chains or clasps can be blurry. Now for Georgia’s expertise…
This may come as a shock, but those crisp and clear professional close ups of jewellery are almost always made up of multiple photos that are then put together in post-processing.
If you’re struggling with getting everything in focus that you want to be in focus, even with a super small aperture number, then you’re missing this trick – it’s called focus stacking.
This video from Visual Education is a great example, but the general concept is that you place your camera on a tripod so you have the exact same placement for all your shots, keep your jewellery, styling and lighting all the same, then take multiple photos with your focus on different parts of your product.
Using Photoshop, you can then add these all as layers, auto align and then auto blend. This will merge all your focused areas into one photo! Magic.
9. Structure your main menu with product categories
New in. Necklaces. Earrings. Rings. Bracelets. Bespoke. Sale.
Ok, you can remove the options that don’t apply, rearrange them, and add in any I’ve missed off, but this is the main menu you need on your jewellery website.
The main menu of a website is one of the most impactful spaces when it comes to optimising your user experience (UX). Making sure your menu is packed with links through to products means that wherever your customer lands on your jewellery website – be that your home page, a product, a blog – they can always see what you sell, and access a list of products with a single click.
10. Lean in to linked products
It’s way easier to sell two products to one person than it is to sell two products to two people.
This is a common marketing sentiment/principle, and probably applies more to jewellery than most other industries.
It’s pretty unusual for a jewellery-wearing consumer to only own a single piece of jewellery. We kinda already know that jewellery customers are open to making multiple jewellery purchases, so it’s just a question of how we can convince those customers to buy more from you and not your competitors.
Here’s where linked products come in.
A linked product is just a connected product, and usually a suggestion of where your website visitor should go next. The most common type of linked product are the related products at the bottom of a product page – usually powered by a category or collection.
You’ll often find upsell products – alternative higher-end items of jewellery – and cross-sell products – jewellery intended to be purchases in addition to the viewed product.
I like to take things a step further, and manually create links between products on our jewellery clients’ websites. This could be other pieces from a matching set – like earrings to match a necklace – or complementary pieces – like 3 different gold chain necklaces.
Hannah from SLAB has a creative solution to creating custom linked products using tags in Squarespace.
I love doing this! In Squarespace I create tags for my products that don’t actually show up to the end users at all, but mean that I can be super specific about which products are linked to which.
11. Embrace jewellery bundles/sets
Product bundles or gift sets are eeeevvvvveeerrryyything when it comes to gifting.
Let’s say Mischa has a budget of £100 to buy Moira a birthday present, and because of Moira’s not-so-subtle hints, Mischa knows that Moira is a fan of your jewellery.
Mischa visits your jewellery website, and finds a list of 120 lovely products that are priced from £20 – £80, and has no idea where to start. See, Mischa really wants to make Moira happy, but gets paralysed by the decision of what to buy and the fear of getting it wrong.
Next, Mischa visits your competitor’s website, and in addition to their 120 products that are also £20 – £80, your competitor also has a collection of gift sets. These bundled products are just combinations of other items, curated by the jeweller, and come in a nice box.
What’s more, they’re named:
- The minimalist gold jewellery gift set, £90
- The seaside silver jewellery gift set, £100
- The ultra luxe pearl jewellery gift set, £110
- The maximalist gemstone jewellery gift set, £120
Mischa knows that Moira loves colour, so she gets the maximalist gemstone jewellery gift set – going £20 over budget because it sounds like a great fit for Moira, and removes all of that stressful guesswork.
12. Encourage user generated content (UGC) to use on your jewellery website
User generated content (or UGC) covers any content about brand or its products that is not created by the business itself. In small business world, most of the time when we’re talking about UGC, we mean customer photos and videos.
UGC is wildly valuable to jewellery brands – it helps sell your brand lifestyle by literally showing pieces in situ, helping customers to picture how ruddy cool their fits will look with your jewellery.
Adding subtle cues to encourage UGC from customers can make all the difference. This can be as simple as just using existing UGC on your product pages (always ask permission from the creator/photographer first), to writing short, snappy lines of text literally asking your customers to tag you in their pics on Instagram, or their videos on TikTok.
Incentivising UGC can significantly increase the chances of your customers creating and sharing content, just like 10% off incentives convince your audience to join a mailing list.
To start generating that lovely content, try offers like 10% or £5 off when someone tags their jewellery, or monthly prize draws/random gifts for anyone who has shared a picture.
13. Set expectations on made to order jewellery
If Amazon can fulfil an order in 12 hours, why can’t you? Oh, because you need to make it first.
Making products to order is more common within the jewellery industry than many others, but it’s still not particularly expected.
Expected being the key word here.
Failing to meet a customer’s expectations is often the core cause of any customer service complaint. That’s why it is our job as small business owners to set expectations realistically, especially when they go against a norm like ultra-speedy order fulfilment.
Adding a sentence to a product description is a good start, but often won’t catch your customers’ attention.
Instead, wherever you have a process or timeline that might not be expected by your customer, you need to metaphorically shout it from the rafters.
Use big, bold text. Add ‘made to order’ banners to your product listings and pages. I’d even add those top banners to your home page, basket and checkout.
If you are getting customer service enquiries about the same unmet expectation, your website can usually solve this. So have that rant with your small business mates about how nobody reads the gosh-darn product description, and then head to your website and make that disclaimer bigger, bolder, louder and more unmissable.
14. Create a ready-to-ship collection on your made-to-order jewellery website
And for our final point, let’s head back to the wonderful Hannah from SLAB:
I have a note on every product page to say how long they’ll take to be made to order. I also remind people about the made to order timelines in their order confirmation email. But I do this the other way around too…
I have a page set up for products that are already made and are ready to ship. This is great for promoting at busy times (hello Christmas) when made to order just won’t work. It’s also perfect for pointing people at if they come to me with a short deadline, like a birthday the following week.
So there’s my web design tips for designing a jewellery website. I hope you jewellers and non-jewellers found this one interesting and meaty, as it’s the first deep-dive in our new Website tips for… blog series.
I wanted to tackle this topic with tonnes of specificity and actionable advice, so if you think I’ve nailed it or missed some clonkers – drop me a DM on Instagram via @studio.cotton with your thoughts and questions, as I am all ears (and totes addicted to social media).
Oh, and if you’re a jeweller who wants someone else to build their website – check out our web design services for small businesses 😉